.JPG)
.JPG)


.jpg)


.JPG)


The last of the games we played over the holidays. We weren't really prepared for a cold war game, so we just improvised with what we had. There were four villages with the winner being the one who ended up with possession of the most of them. I've tried to make the pictures a bit bigger so there is some loss in the detail. Here is my friend Dave reaching for another drink.
 The US part of my forces moved quick to capture the town on the extreme right of the allied line to await the Russians. Dave had five battalions of infantry alone, so it was essential that my smaller forces made the most of their carriers and trucks
 More reinforcements moving up. Figures are from my Korean War collection and are a mixture of Imex and Revell
Dave wasted no time in moving his heavy armour up, though they were supported only by the tank riders because they advanced so much quicker than his infantry

The British forces tried to stay in closer contact with each other. These tanks are old plastic Airfix Centurions that used to have little road wheels underneath them

Closer picture of the British armour
 US HQ units directing mortar fire onto the lead elements of the Russian drive in this area
 The second of Dave's five battalions firmly secures the center ground between the two villages most in contest
 US recon Greyhound is smoked from long range by a T34/85 despite being in the partial cover of the village
 US F86 Sabre, by Matchbox, making its only appearance, which strafed the Russian HQ and disrupted all infantry units in this area for a couple of turns because they were all moving under the one order, and the man issuing that order was shaken by the aircraft attack
 The Soviet left of center. Dave grouped his armour here to confront the only US tank platoon in the vicinity, a Pershing. Airfix T34s and Unimodel IS122s
 Meanwhile the British advance on the left was stalled by the arrival of the big boys. Here a British support company digs into the wooded area hoping not to be seen
 The rear of that position. British mortar platoon goes into action firing on the Russian recon units on the edge of the nearby town - converted A Call to Arms 1950s British Infantry (I'm going to get some more of these)
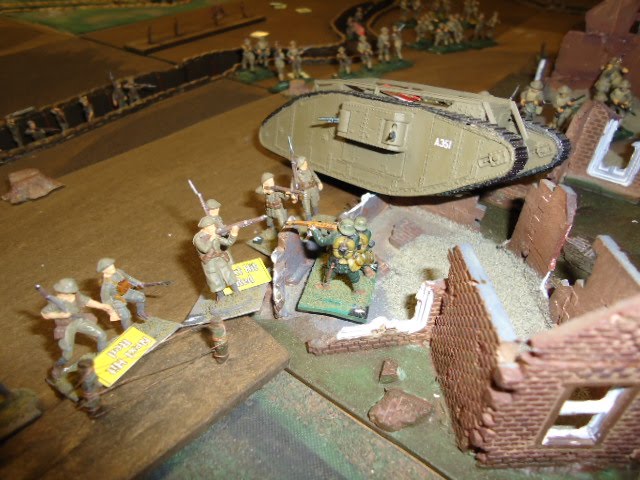
Without infantry support the Soviet recon platoons were badly out matched, and could do little to stop the British infantry taking control of this end of the built up area. Airfix carriers, and again ACTA figures, don't know about the armoured car but it's a resin one


Another shot of the British side of the town having dealt with the Russian recon units


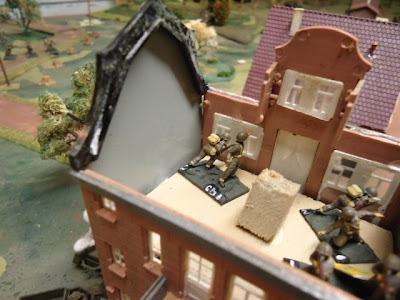
This British company occupied the top floor of this building for several turns making movement in the streets below almost impossible for the few Soviet infantry platoons detailed to oppose them
About turn 7 the Soviets finally got some air support, and one American company suffered about 2/3 casualties from a single pass; an unusually good result but that's dice for you


Turn 9 was a terrible one for the Russians, losing their IS2 company on their right


Dave assaults the allied line from two sides and the command Centurion is forced from the fight for a couple of turns
US anti-tank platoons on the fringe of the heavy wooded area. They were there to back-up the British tank units but had their own problems from the T34/85 platoons advancing from their right

Turn 9 was a terrible one for the Russians, losing their IS2 company on their right

And both T34/85 and SU122 companies on their left. The US lost the Pershing platoon but the allied forces had now cleared the field of all of the Soviet armour
 US troops moving forward now that it was safe to do so, the Mig made another appearance over the same area but made little difference

 Last picture shows the end-game field positions, the British had just begun moving into the small village at the top of the board to add to the Russian's woes

 US troops moving forward now that it was safe to do so, the Mig made another appearance over the same area but made little difference
Second to last turn. US machine gun platoons are firmly in control of the open ground in front of this village and although Dave had two fresh battalions formed up for an assault here the odds were still in US favour and Dave broke off the attack after one cautious advance
 Last picture shows the end-game field positions, the British had just begun moving into the small village at the top of the board to add to the Russian's woes
Ten turns. The allies clearly won in terms of objectives secured, and enemy units neutralised, and for a fraction of the casualties. Dave hardly committed his infantry and by the time he did there was no armour left to support them. The historical games that we do don't really create 'results' like these ones, so they are a lot of fun to play, enough so that I've decided to increase my cold war collection forthwith.